Getting your invitations just right in 3 steps
Andrew Grant said very lucidly “You never get a second chance to make a first impression.” Well, invitations are all about first impressions as it is also a sneak peek of your event.
When planning an event on your own, whether it is a wedding or a corporate outing, there are always some questions about how we will share all the information with the guests.
Nowadays, digital invitations linked to a website are more common and practical, but even when technology is an ally there are some rules to take into consideration.
If you are planning your event without professional assistance, take a look at this article. This may help you to get your organization off to a good start.
STEP 1: Design
Before we dive into the protocol and the not-so-funny work to do, let’s be creative!
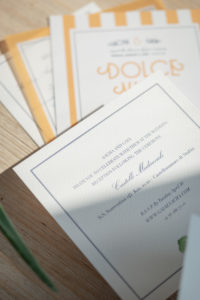
In spite of the lack of a specific theme for the event, I love to see a common thread all the way through. Whether you use paper or digital invitations (or a combination of both), the overall design should be harmonious.
For instance, try to use the same font, color, and type of images when sending the information (save the date, invitation, program, etc.). You can easily create a logo and use it in all the communication.
By maintaining consistency and uniformity, guests will be able to identify the source of the information even without seeing your name. Also, it is beautiful.
Today we have access to tools like Canva which is free, easy to use and proposes plenty of templates you can use and personalize.
STEP 2: Content
Some guidelines may change from a corporate event to a social one, like a wedding. Nevertheless, one golden rule will always be clear communication.
Invitations should include the event name (or full name of the wedding couple), host, place, date, time of the first event (ceremony, cocktail reception, etc.), RSVP, and, sometimes, dress code (not for a wedding). That’s it, nothing more.
Names
Once you have chosen the style of your invitations, there is some work to do. You will need to collect all the information related to your guests beforehand.
This exercise could be easier if we are talking about a corporate event, where normally everything is already digitalized and the information is already collected. However, for social events, this is a meticulous job.
When organizing events on your own, I would highly recommend creating a master list where you could input all the data: title, name, last name, telephone, etc.
Before sending any invitation, double-check the name spelling, if the postal address or email is still valid, and, please request a telephone number, as it may be needed as well
Also, you would need to verify if there is any title: besides “Mrs & Mr.” or “Family”, there may be “Doctor” “Honorable”, and others.
Here are some other etiquette rules:
- Married couples are invited together as well as families that live at the same address (under-age children). If someone from the same family is now living alone, must receive a separate invitation.
- If the couple has the same last name you should write first the name of the person whom the family name is. For instance “Mrs. & Mr. John Smith”
- If the couple has a different last name or one of them has a special title, then you should write the full name of each of them. I would like to point out that the title is most important than the gender if it is the woman who is the doctor you should write “Doctor Melanie and Mr. John Smith”
- For unmarried couples, you should write each name in a different line.
- For single guests, it is a nice touch to include the +1 of your guests if you do not have a name or it is uncertain. “Mr. John Smith and guest”
- The whole name should be written in the middle of the envelope. It is crucial the guests feel important. Do not abbreviate the name.
- Postal Address just below the name, in a very comprehensible manner. Avoid the abbreviations: “St. = Street”
- Always mention the sender’s information on the back of the envelope. It is important for following up in case it is returned.
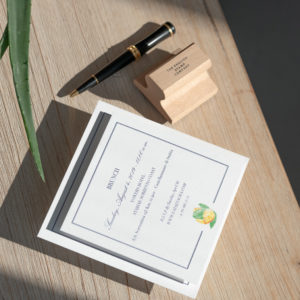
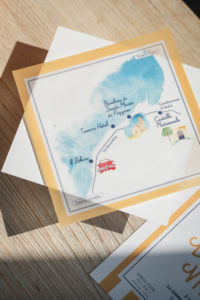
Place, Date & Timing
Naturally, you should mention where and when the event will take place. If the location is “secret”, you need to inform the meeting point and the timing of departure.
For events that last more than 1 day, I would suggest creating a program indicating all the activities with place and timing.
Regarding social events, where there may be a cocktail reception followed by a dinner/party, you should just indicate the time the cocktail starts.
Attire
Dress codes are appreciated by guests when they are specified in the invitation. This will also save you some time answering questions about it before D-Day.
There are many options for a dress code. In case you’re having a 2- or 3-day event, you should list the attire for each day – “Black Tie”, “Formal”, “Cocktail” or “Casual”.
Sometimes, it helps to add some pictures or photos of what you wish as an outfit, especially now that we see so many sub-categories and free interpretations.
RSVP
How and by when guests must RSVP should be stated. It could be sent as a separate card and envelope within the invitation or it could be done by email, telephone, through the website, and so on.
If you go full paper, I would recommend doing it separately, with a card including the +1 and eventually some food requirements.
The RSVP could also be a link to a website where each guest will be asked to fill out the same information.
Once the deadline passes, and if you have missing answers, you could always follow up directly with guests.
Website
Creating a website greatly facilitates the delivery of information, including modification all along and last-minute changes (do not forget that we just came out of a pandemic). Everything I just mentioned could also be found on a website: RSVP, program, dress code, location, etc.
In case you make one, mention it in the invitation or put a link to it if it is a digital one. However, be aware that not every guest will read it, therefore you may need to repeat where to find the information multiple times during the organization process.
STEP 3: Distribution
I find personally handing out invitations to be very romantic and elegant. Although I understand that sometimes it may not be possible to do and it requires a lot of time and effort.
When should an invitation be sent?
Tradition says that you should send your invitations between 6 and 8 weeks before the event. This timeline gives the guests enough time to organize.
Nonetheless, if we are talking about a destination event (for instance: a wedding) I would suggest sending them 5 months in advance.
Save the Date
The term “Save the Date” actually means to officially reserve a date for an upcoming event. Even when you do not have all the information yet, you can send them out so your guests know that something is going to happen and when.
I would highly advise sending out a Save the Date. Depending on the type of event, you could send it 5 to 6 months prior. If it is a destination wedding I would say, 12 to 10 months in advance.
Remember that it is never too early to let your guests know about your party, and some of them will even appreciate it.
The Save the Date should include the event name or nature, the date, the city, and the venue if you already have it. You could also mention that a formal invitation will follow.
When should the RSVP deadline be?
Once again, this will depend on the nature of your event, and the level of personalization you will be offering. Therefore, you may want to have the confirmed list in advance. There is no fixed rule, but I would say between 6 and 3 weeks before the event.
Tip: when preparing stationery to send, it is best to close the envelope with specially designed stamps or stickers related to the event.